Effective Tips for Cleaning Bathtub Grout
I’ve always found that keeping my bathroom clean can be a daunting task, especially when it comes to bathtub grout. Over time, it can accumulate dirt and stains that make it look less than inviting. I’ve tried various methods to tackle this issue, and I’m excited to share some effective tips that really work. With the right supplies and techniques, I’ve managed to restore my grout to its original shine. Let’s dive into how I keep my bathtub grout looking fresh and clean!
Understanding Grout Composition
I’ve always found it fascinating how different types of grout can impact the overall look and durability of my tiled surfaces. By diving into the composition of grout, I can better appreciate its various materials and qualities. Let’s explore the key aspects of grout, starting with the types of grout materials.
Types of Grout Materials
Different types of grout materials, like epoxy and cement-based options, really influence how well my projects turn out. I’ve noticed that epoxy grout tends to resist stains and moisture better than traditional cement-based grout. I often choose cement-based grout for its cost-effectiveness and ease of use. When I’m working on a project that requires flexibility, I lean towards urethane grout. Each material has its own strengths, so I always consider the specific needs of my project.
Grout Composition Breakdown
Grout composition breakdown reveals how ingredients like cement, sand, and additives work together to enhance both strength and flexibility. I’ve learned that the right blend can significantly affect the grout’s performance. It’s interesting to see how the size of sand particles can influence the texture and application process. I’ve also noticed that certain additives can improve water resistance and reduce cracking. Understanding this composition helps me make more informed choices when selecting grout for my projects.
Importance of Grout Quality
The quality of grout really matters when it comes to the longevity and appearance of my tile installations. I’ve noticed that using high-quality grout makes a significant difference in preventing stains and mold. Cheaper grout tends to deteriorate faster, leading to more frequent repairs. It also affects the overall aesthetic, as poor quality can result in uneven color and texture. Investing in quality grout has saved me time and effort in the long run.
Common Causes of Grout Discoloration
Mold and mildew often creep into the grout lines, causing those unsightly dark stains that nobody wants to see. I’ve noticed that moisture accumulation from showering can create the perfect environment for these unwanted guests. Sometimes, it’s the soap scum that builds up and clings to the grout, making it look dingy. I’ve found that hard water deposits can also contribute to discoloration, leaving a chalky residue behind.
When I forget to properly ventilate the bathroom, it seems like the humidity just encourages more mold to grow. I can’t overlook the impact of dirt and grime that gets tracked in from outside, which can settle into the grout over time. Even the cleaning products I use can leave behind stains if they’re not rinsed away thoroughly. I’ve realized that using colored bath products can stain the grout, making it look worse than before. Keeping an eye on these common causes helps me maintain a cleaner, brighter look for my bathtub grout.
Essential Cleaning Supplies You’ll Need
When it comes to tackling grout cleaning, I’ve found that having the right supplies makes all the difference. I can’t stress enough how essential it is to gather the proper tools and products before diving in. So, let’s go over the recommended cleaning tools and must-have cleaning products you’ll need.
Recommended Cleaning Tools
I’ve realized that having a sturdy scrub brush and a good quality sponge are key to effective cleaning. I always keep a small toothbrush on hand for those tight spots that need extra attention. A microfiber cloth is essential for wiping down surfaces after scrubbing. I also find that a spray bottle for my cleaning solution makes application so much easier. Lastly, I never underestimate the power of rubber gloves to protect my hands while I clean.
Must-Have Cleaning Products
Must-have cleaning products really enhance my efficiency and effectiveness during the cleaning process. I always keep a good-quality grout cleaner on hand, as it works wonders on stubborn stains. I’ve found that using a soft-bristle brush helps to get into the grooves without damaging the grout. A spray bottle filled with vinegar and water is my go-to for a natural alternative. Finally, I never forget to have microfiber cloths ready to wipe everything down for a sparkling finish.
DIY Cleaning Solutions for Grout
When it comes to tackling stubborn grout stains, I’ve found that DIY cleaning solutions can be a game changer. I love experimenting with different homemade mixtures that are both effective and easy to make. Let me share a few of my go-to methods for cleaning grout.
Homemade Baking Soda Paste
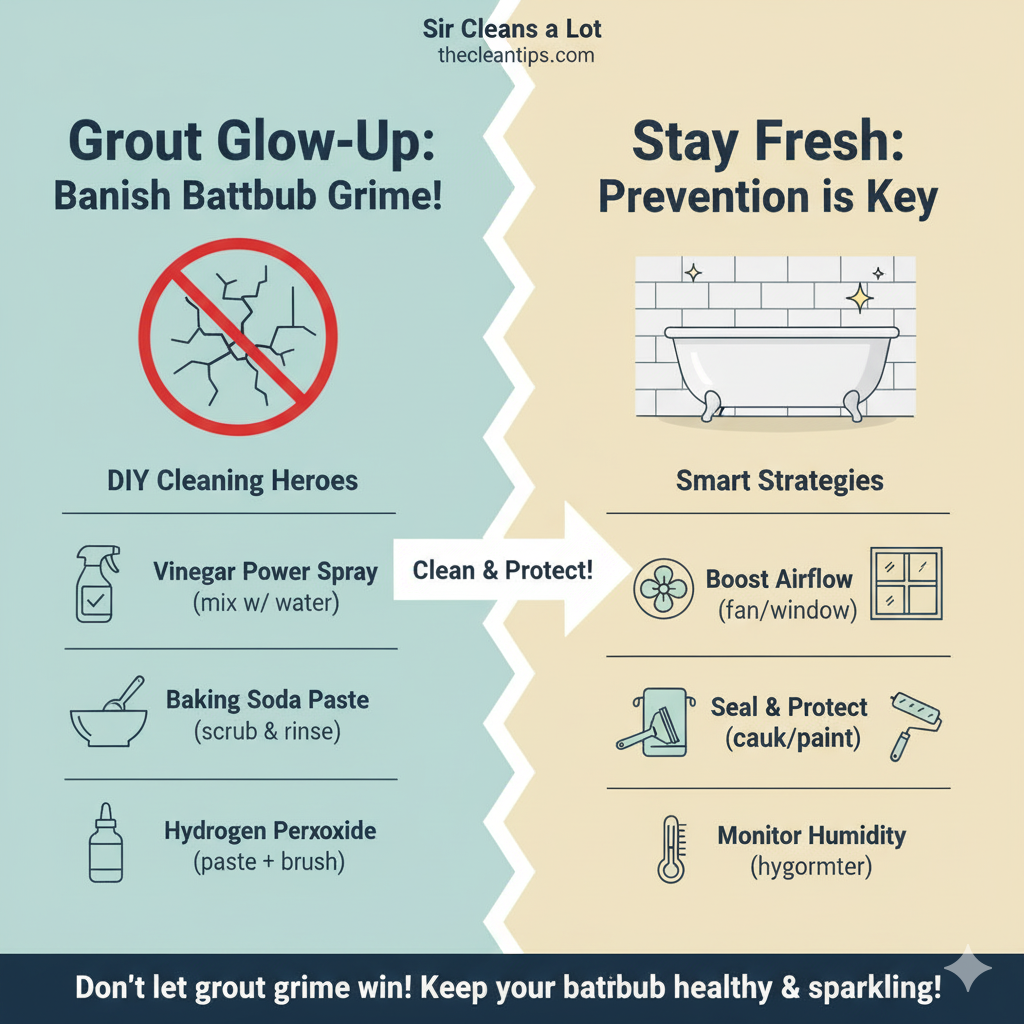
Homemade baking soda paste works wonders on grout stains, and it’s so simple to whip up. I just mix baking soda with a bit of water until I get a thick consistency. Once I apply it to the grout, I let it sit for about 10-15 minutes. After that, I scrub it gently with an old toothbrush. It’s amazing how easily the stains lift away with just a little effort!
Vinegar and Water Mixture
A vinegar and water mixture works wonders for refreshing grout without harsh chemicals. I usually mix equal parts of vinegar and water in a spray bottle. After spraying the solution onto the grout, I let it sit for a few minutes. Then, I scrub it with a toothbrush and rinse it off with warm water. The results always leave me amazed at how clean the grout looks!
Hydrogen Peroxide Method
Hydrogen peroxide works wonders for brightening and disinfecting grout, and it’s one of my favorite methods to use. I mix it with baking soda to create a paste that clings to the stains. After applying it, I let it sit for about 10-15 minutes to work its magic. Once the time’s up, I scrub it with a brush and rinse it off. The results always leave me impressed and my grout looking fresh.
Using a Steam Cleaner Effectively
I’ve found that using a steam cleaner can be a game changer for tackling bathtub grout. With the right approach, it’s easy to achieve sparkling results. Let’s dive into some effective tips to get the most out of my steam cleaning experience.
Choosing the Right Machine
Choosing the right machine can make all the difference in how effectively I tackle my cleaning tasks. I’ve learned that not all steam cleaners are created equal, and I need one with the right attachments for grout. It’s crucial for me to consider the machine’s pressure and temperature settings to ensure optimal cleaning. I always check reviews and ratings before making a purchase, as they give me insights into the machine’s performance. Ultimately, investing in a quality steam cleaner saves me time and effort in the long run.
Prepping Your Grout Area
Preparing my grout area properly makes a significant difference in the effectiveness of steam cleaning. I always start by removing any loose debris and dirt from the surface. Then, I make sure to clear away any personal items or accessories that might be in the way. After that, I like to wet the grout slightly, as it helps the steam penetrate better. Finally, I double-check to ensure the area is well-ventilated for optimal cleaning.
Steam Cleaner Techniques
Steam cleaner techniques can significantly enhance the efficiency of my cleaning routine. I always start by choosing the right attachment for my steam cleaner to target the grout effectively. By moving the steam nozzle slowly along the grout lines, I ensure the steam penetrates deeply. After steaming, I wipe away the loosened dirt with a microfiber cloth for a spotless finish. I’ve noticed that using distilled water in my steam cleaner helps prevent mineral buildup, keeping it in top shape.
Preventive Measures to Keep Grout Clean
Keeping grout clean is much easier when I regularly apply a protective sealant. I make sure to choose a high-quality sealant that’s designed for bathrooms. After I’ve cleaned the grout, I let it dry completely before applying the sealant. I also try to wipe down the tiles and grout after each use to prevent buildup. Using a squeegee helps minimize moisture, which keeps mold at bay. I like to keep the bathroom well-ventilated to reduce humidity levels. Every few months, I inspect the grout lines for any signs of wear or damage. If I notice any issues, I reapply the sealant right away. These simple steps make a huge difference in maintaining clean grout.
When to Call a Professional
Sometimes, despite my best efforts, I find that certain grout issues just won’t budge. It’s during those moments that I realize it’s time to consider professional help. Here are some signs that indicate I might need to call in the experts.
Signs You Need Help
I know it’s time to seek help when I see persistent stains that just won’t go away. If my grout looks discolored despite my cleaning attempts, I start to worry. When I notice cracks or chips in the grout, I realize I can’t fix it on my own. If mold or mildew keeps returning, I know I’ve hit a dead end. Lastly, when I feel overwhelmed by the amount of work needed, I understand it’s time to call in the professionals.
Persistent Stains and Odors
Persistent stains and odors can be incredibly frustrating, and I often feel overwhelmed when they don’t seem to go away. I’ve tried every cleaning solution I could find, but some stains just refuse to lift. It’s disheartening to scrub and scrub without seeing any improvement. The lingering smells make me question if I’m really getting everything clean. Sometimes, I wish I could just wave a magic wand and make it all disappear.
Time vs. Cost Analysis
Balancing time and cost often leads me to weigh whether tackling a project myself is worth the potential savings. I sometimes underestimate how long it’ll take me to clean the grout thoroughly. When I calculate the cost of my time versus hiring a professional, I’m often surprised by the difference. There are days when I just can’t justify the effort for a small financial gain. In the end, I’ve learned that some projects are better left to the experts.
Maintaining Grout for Long-lasting Results
I’ve learned that maintaining grout is essential for keeping my bathroom looking fresh and clean. By sticking to a few effective practices, I can prevent issues before they start. Here are some key points I keep in mind for long-lasting results.
Routine Cleaning Practices
Routine cleaning practices help me avoid the buildup of dirt and grime that can make grout look dull. I make it a point to wipe down the surfaces after each use. Using a squeegee helps me keep the tiles and grout dry. I often use a gentle cleaner to maintain its appearance without causing damage. By dedicating just a few minutes each week, I can ensure my grout stays bright and clean.
Preventing Mold Growth
Keeping moisture levels low is crucial for preventing mold growth in my bathroom. I always make sure to use a fan or open a window during and after showers. I also wipe down the surfaces with a towel to eliminate excess water. Regularly checking for leaks helps me catch any issues before they escalate. Lastly, I like to use mold-resistant products to ensure my grout stays clean and safe.
Choosing the Right Products
Choosing the right products makes a significant difference in how well my grout stays clean and protected. I always opt for pH-balanced cleaners that won’t damage the grout. Whenever I can, I prefer to use natural ingredients like vinegar and baking soda for my cleaning routine. I’ve found that sealants designed specifically for grout help maintain its integrity over time. With the right products, I notice a substantial reduction in stains and mold growth.
Frequently Asked Questions
How often should i clean my bathtub grout?
I usually clean my bathtub grout about once a month to keep it looking fresh. If I notice any stains or buildup, I might do it more frequently. It really depends on how much I use the tub and how quickly it gets dirty. I’ve found that regular cleaning helps prevent tougher grime from forming later on.
Can i use bleach on colored grout?
I wouldn’t recommend using bleach on colored grout because it can cause discoloration and damage. I’ve found that bleach is really effective for white grout, but colored grout usually requires a gentler approach. Instead, I prefer to use a mild cleaner or a vinegar solution that’s safe for colors. It keeps the grout looking fresh without risking any fading or unwanted changes.
What are the signs that my grout needs to be replaced?
I’ve noticed a few signs that indicate my grout might need to be replaced. If it’s cracking, crumbling, or has significant discoloration that won’t come out with cleaning, it’s probably time. Also, if I’ve got mold or mildew that keeps coming back despite my best efforts, that can be a red flag. Lastly, if the grout feels loose or is pulling away from the tiles, I know I should consider replacing it.
If you’re looking to enhance your cleaning skills beyond just bathtub grout, I highly recommend checking out the page on effective techniques for cleaning grout on tile floors. This resource offers valuable insights and practical tips that can help you tackle stubborn grout in various areas of your home. You can explore it further here: clean grout on tile floors.